Zeven Development
 This is an image title
 This is an image title
 This is an image title
 This is an image title
 This is an image title
Hydroponics Chiller
Build your own low cost closed system Hydroponics Chiller in your garage!
Using low cost off the shelf components build yourself a low cost computer controlled closed system chiller. When using the aeroponics method of hydroponics, it is recommended to chill the water reservoir to 68°F to reduce algae growth and maintain a high oxygen content.
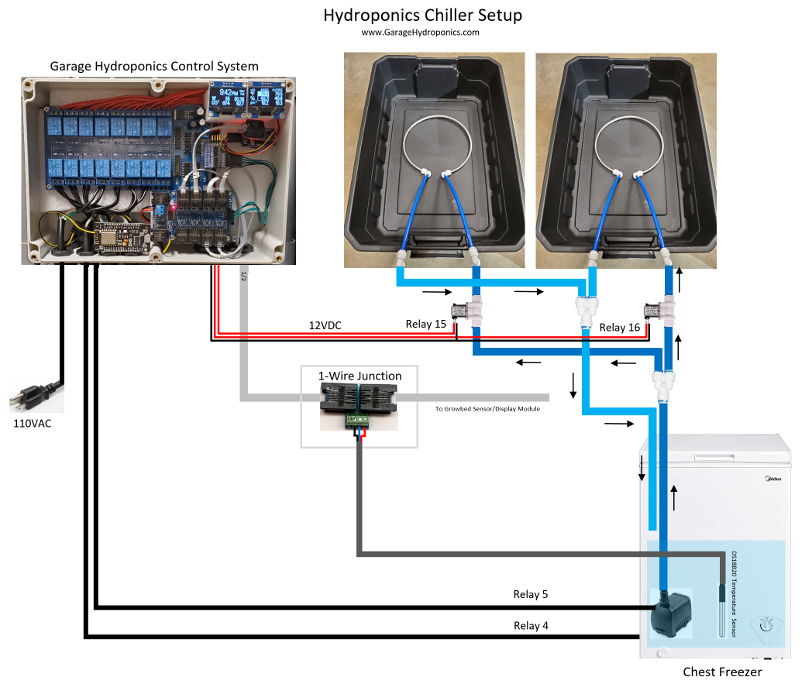
Use a chest freezer to build yourself a low cost closed loop hydroponics chiller. The freezer will hold chilled water and cycle between 45°F to 55°F and pumped to the chiller coils in the growbeds, to maintain a 68°F water level. The system is closed loop so that you can grow different types of plants in each growbed with different nutrient levels.
Setup Diagram
Chiller Parts


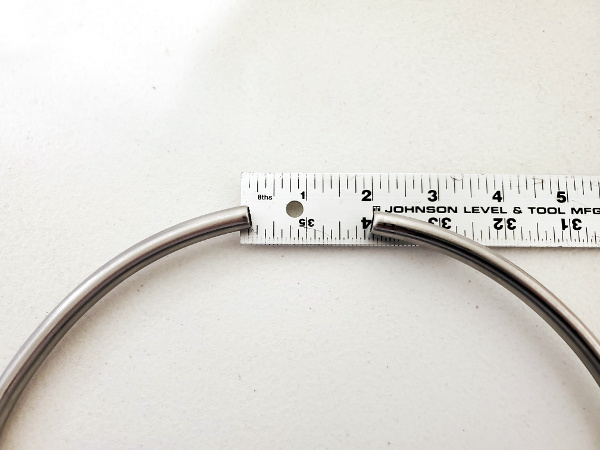
Using the RIDGID close quarters tube cutter, cut the wort coil 2" less than a complete circle. Go slow and careful to make sure you get a clean cut without denting the pipe. The tubing is thin, so it only requires a little bit of pressure to cut it.
Push the elbow connectors onto the end of the cut coil and attach a short amount of the curve tubing so that the stainless steel coil rests flush on the bottom of the resevoir tote. Make sure there is enough room for the air stone to be placed in between. You can bend the stainless steel coil slightly to increase the gap size. Place elbow connectors onto the end of the tubing so it will allow the tubing to hang down without bending and hold the chiller coil in place.
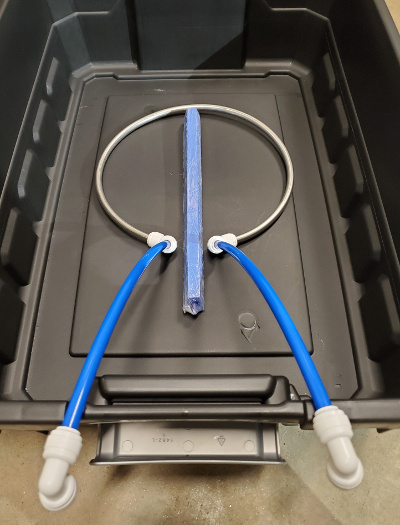
Using an exacto knife cut slots into the back of the tote and slot the chiller coil tubing into the holes so that when the tote lid is secure it will lock the chiller in place. Make sure the slot is cut deep enough for the tote lid to close without any pressure on the connectors.
Looking at the chiller coil installed from the rear, make sure the stainless steel coil is still resting at the bottom by the natural downward curve of the tubing.
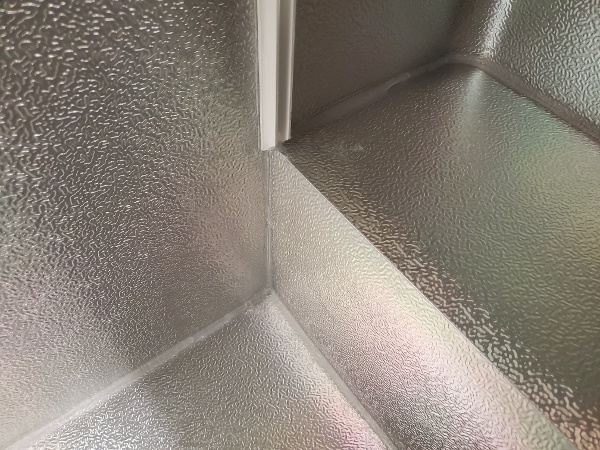
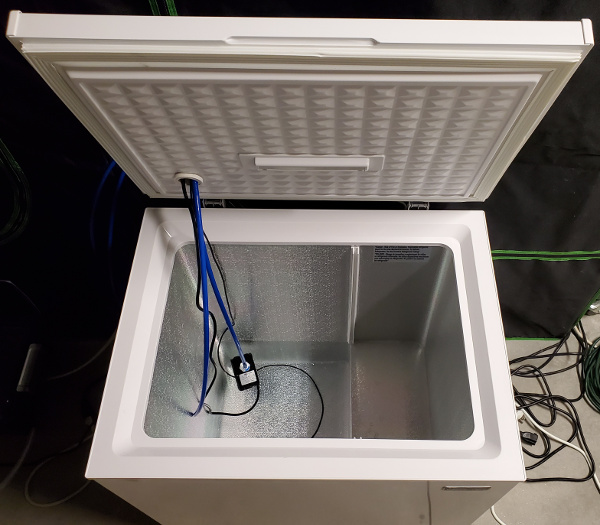
To prepare the chest freezer for use we need to seal it and cut an access hole on the top of the lid to feed the in/out 3/8" tubing, water pump power, and temperature sensor.
Since we are going to fill the chest freezer half way with water we need to waterproof the inside of the freezer with Loctite clear silicone waterproof sealant. Make sure you use aquarium grade sealant and allow 24hrs for the sealant to properly cure.
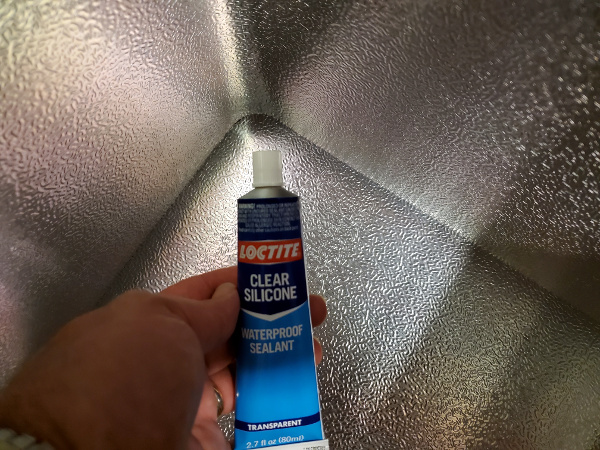
Locate all the edges that are not bent and apply a generous amount of sealant.
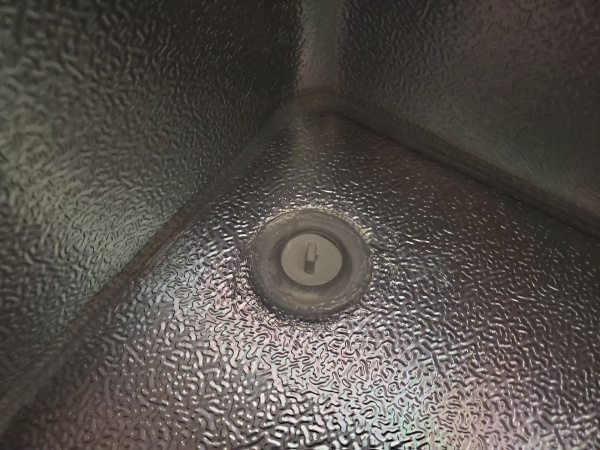
Make sure that you also seal the edges of the outtake and seal the dain hole with a plug or expansion nut. My freezer came with a drain plug.
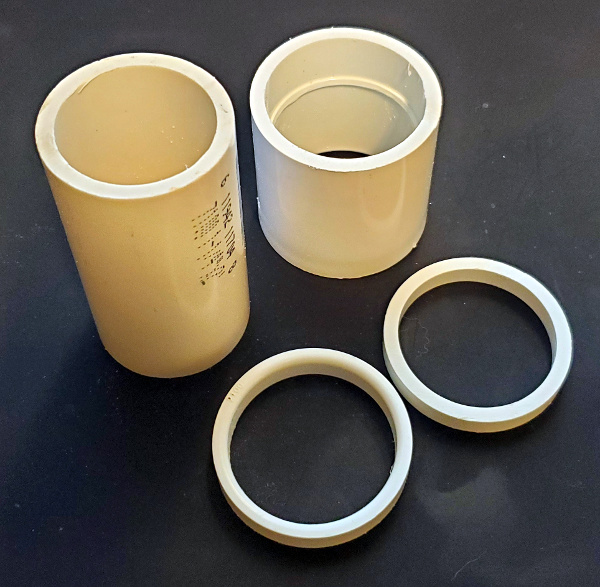
Cut a 3" length of 1 1/4" PVC pipe. This will be used to protect the hole in the chest freezer lid. Next take the 1 1/4" coupling and cut two 1/4" rings from one side.
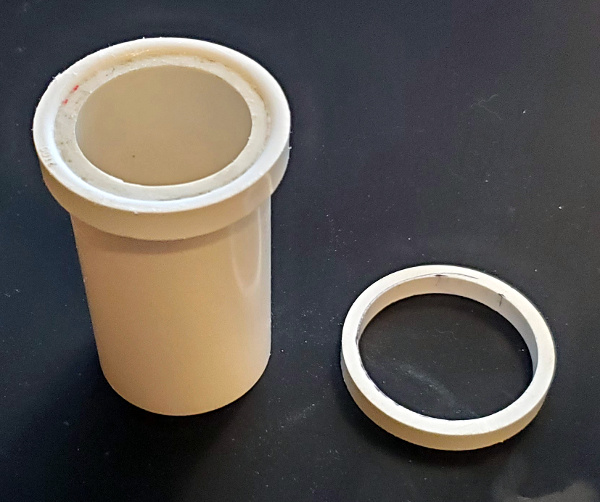
Take the top ring and glue it to the top of the 3" pipe.
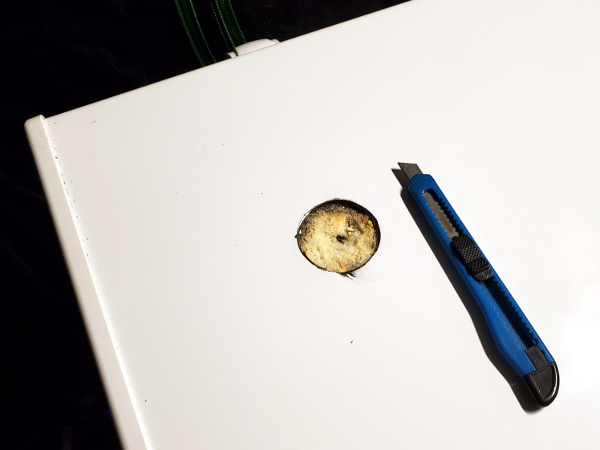
Using a 1 5/8" drill bit, carefully drill only the top metal plate off the freezer lid, 5" from the left and 5 1/2" from the back.

Take a long exacto knife blade and carefully cut the foam insulation from inside the hole. The freezer lid has a light in the lid, and you don't want to cut this wire.
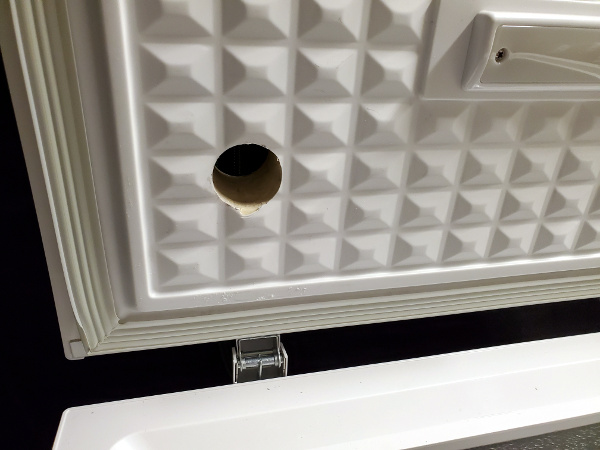
When you have removed all the foam use the drill again to carefully cut out the inside plastic ceiling of the freezer lid.
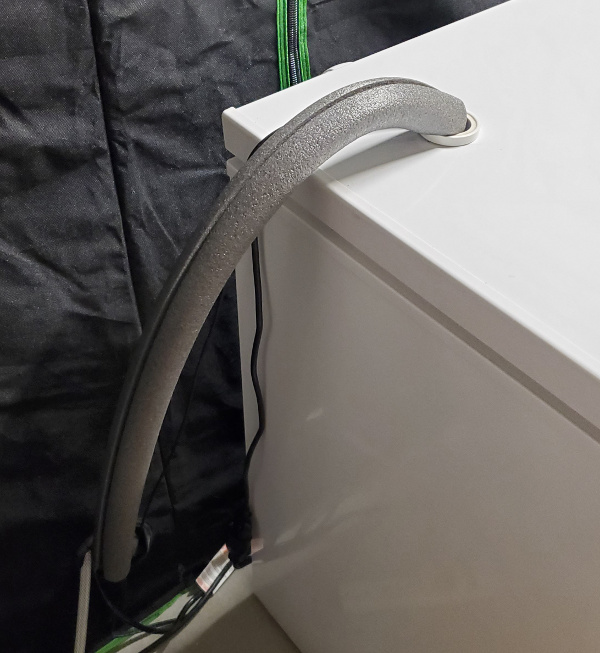
Insert the PCV pipe into the drilled out hole. Use a dremel tool if you need to make the hole slightly larger. For maximum insulation, the pipe needs to fit tightly.
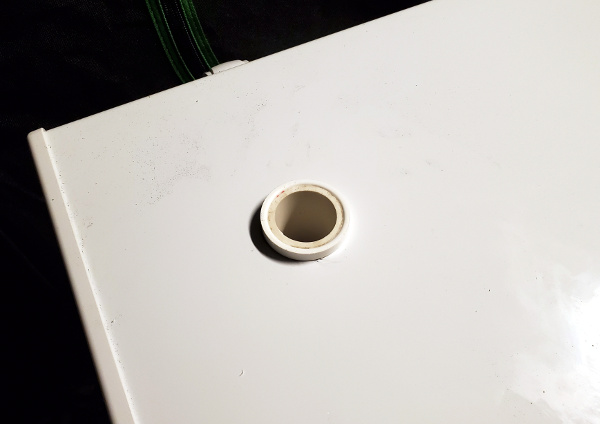
Take the remaining PVC ring and fit it over the protruding pipe. Since this ring is the second cut ring it should be tighter than the top ring since the coupling is tapered by design and should hold in place without any glue.
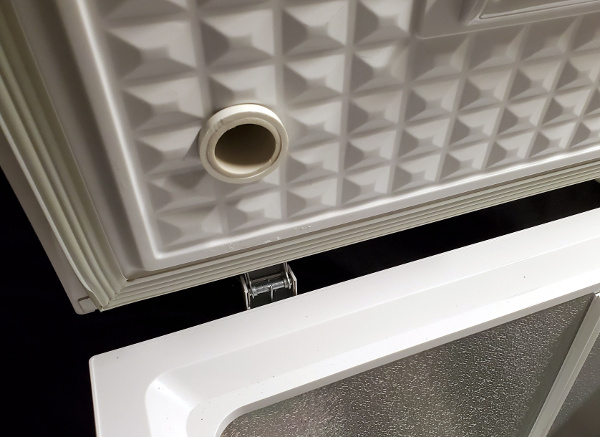
Connect and run the submersible water pump power, in/out tubing and the temperature sensor through the freezer lid hole.
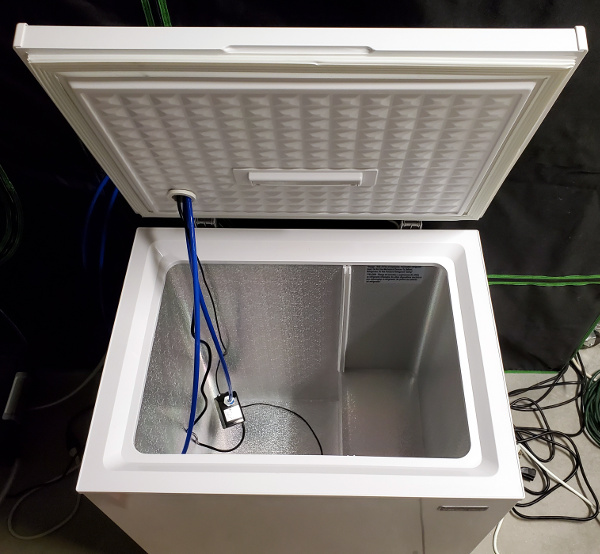
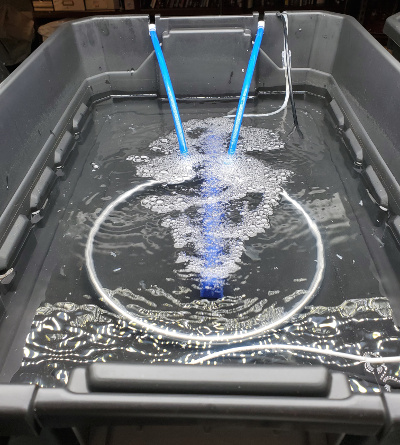
Before you use the chiller system, partially fill the freezer with water and make sure there are no leaks then fill it half way and check for leaks again.
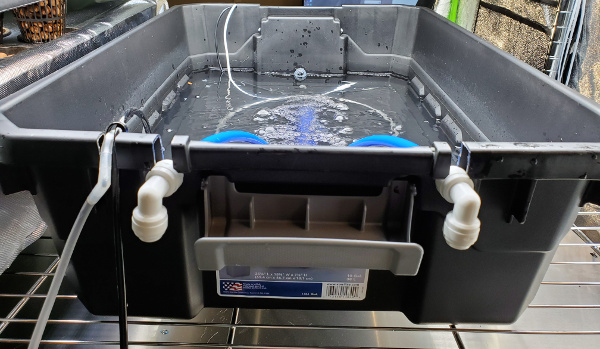
Connect all the tubing, wire in the solenoids and make sure that you use the blue locks on all the connectors.
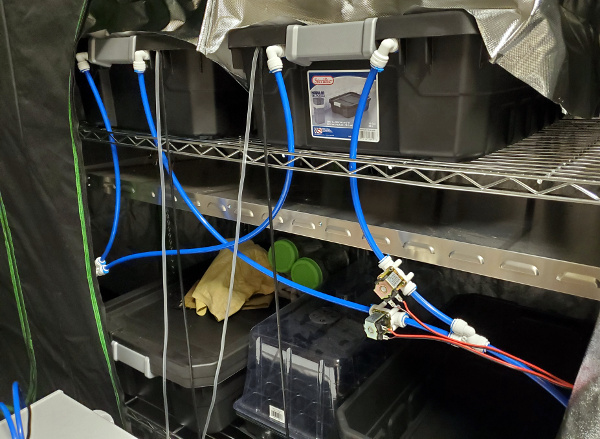
Finally insulate all the tubing from the freezer to the splitters.
Chiller Code
The freezer is turned on/off by the temperature sensor reading that is taken once a minute with a minimum cycle time of 10 minutes. This is done in order to protect the freezer compressor. The water in the freezer will fluctuate between 50°F and 60°F. A single water pump will flow the cold water through the pipes, but the solenoids will control which chilling coil is active.
#define CHILLER_ON              "e4o"
#define CHILLER_OFF             "e4f"
#define WATER_PUMP_ON           "e5o"
#define WATER_PUMP_OFF          "e5f"

...

#define SOLENOID_ON_WATER_TEMP  66.25
#define SOLENOID_OFF_WATER_TEMP 65.75
#define CHILLER_ON_WATER_TEMP   60
#define CHILLER_OFF_WATER_TEMP  50
#define CHILLER_CYCLE_TIME      10          // Chiller minimum on/off time to protect compressor

...

#define CHILLER_SOLENOID_POWER  5           // Water Solenoid Valve 4.8W
#define CHILLER_POWER           121         // Freezer 5ct

...

const char CHILLER_SENSOR[] =   "t2r76";     // Chiller Sensor 1-Wire Junction DS18B20 *** Change 76

...

void loop() {

...

  static int8_t chiller = false;

...

  float chiller_temp;
  static uint8_t chiller_cycle = CHILLER_CYCLE_TIME;

...

        // Check chiller temp
        if (SerialCmd(CHILLER_SENSOR)) {
          if (SerialReadFloat(&chiller_temp)) {
            if (chiller_cycle) chiller_cycle--;
            else {
              if (chiller) {
                if (C2F(chiller_temp) <= CHILLER_OFF_WATER_TEMP) {
                  chiller_cycle = CHILLER_CYCLE_TIME;
                  chiller = false;
                }
              }
              else {
                if (C2F(chiller_temp) >= CHILLER_ON_WATER_TEMP) {
                  chiller_cycle = CHILLER_CYCLE_TIME;
                  chiller = true;
                }
              }
            }
          }
          SerialReadUntilDone();
        }
        else {
          chiller_temp = ERROR_NO_ROM;
          chiller = false;
        }

...

          // Check chiller pumps
          if (grow_bed->chiller_relay) {
            if (chiller >= 0 && C2F(chiller_temp) <= CHILLER_ON_WATER_TEMP) {
              if (grow_bed->water_temp_error) grow_bed->chiller_solenoid = false;
              else {
                if (grow_bed->chiller_solenoid) {
                  if (C2F(grow_bed->water_temp) <= SOLENOID_OFF_WATER_TEMP) grow_bed->chiller_solenoid = false;
                }
                else {
                  if (C2F(grow_bed->water_temp) >= SOLENOID_ON_WATER_TEMP) grow_bed->chiller_solenoid = true;
                }
              }
            }
            else grow_bed->chiller_solenoid = false;
            Serial.print("e");
            Serial.print(grow_bed->chiller_relay);
            SerialCmdDone((grow_bed->chiller_solenoid) ? "o" : "f");
            if (grow_bed->chiller_solenoid) {
              water_pump = true;
              AddPower(CHILLER_SOLENOID_POWER);
              delay(100); // Add a delay for current in rush to the solenoid if powered by the same 12V rail as the IO Expander and x16 Relay module
            }
          }

...

        SerialCmdDone((chiller) ? CHILLER_ON : CHILLER_OFF);
        SerialCmdDone((water_pump) ? WATER_PUMP_ON: WATER_PUMP_OFF);

...

        if (chiller) AddPower(CHILLER_POWER);
        if (water_pump) AddPower(WATER_PUMP_POWER);

...

              if (!prev_grow_bed->water_level) Serial.print(";sf0;sa0;sd0,0,\"LOW\"");
              else if (prev_grow_bed->chiller_solenoid) Serial.print(";sf0;sa0;sd0,0,\"CHILL\"");
              if (!grow_bed->water_level) Serial.print(";sf0;sa1;sd126,0,\"LOW\"");
              else if (grow_bed->chiller_solenoid) Serial.print(";sf0;sa1;sd126,0,\"CHILL\"");
Monitoring and Display in Grafana
Notice in the growbeds, that the drop in temperature is considerably faster than the rise. This slope differential is important to not overload your chiller allowing it adequate recovery time. There should also be at least a 15°F differential between the growbeds desired temperature and the chiller temperature to allow for successful temperature cycling.
OLED Display
When the chiller is active for the growbed it will be displayed on the Growbed Display Module.

For the Complete Garage Hydroponics Solution please see our other projects
Garage Hydroponics
Hydroponics Deep Water Culture Bucket System
Hydroponics Growbed Sensors/Display Module
Hydroponics Chiller
Hydroponics Water/Nutrient Control
Hydroponics Database Management
Hydroponics Germination Control
Hydroponics CO2 Monitoring
Hydroponics Light Monitoring
Hydroponics pH and DO Monitoring