Zeven Development
 This is an image title
 This is an image title
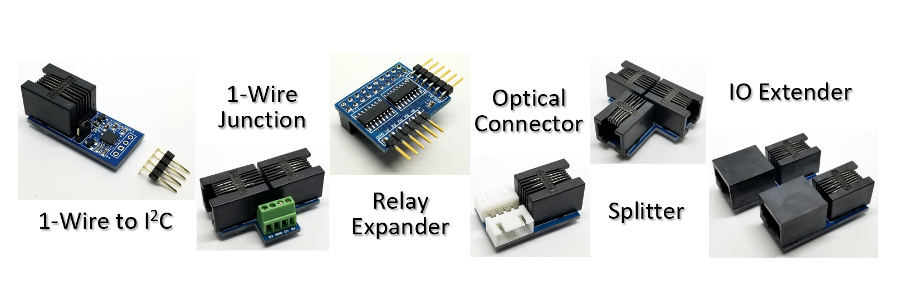 This is an image title
 This is an image title
 This is an image title
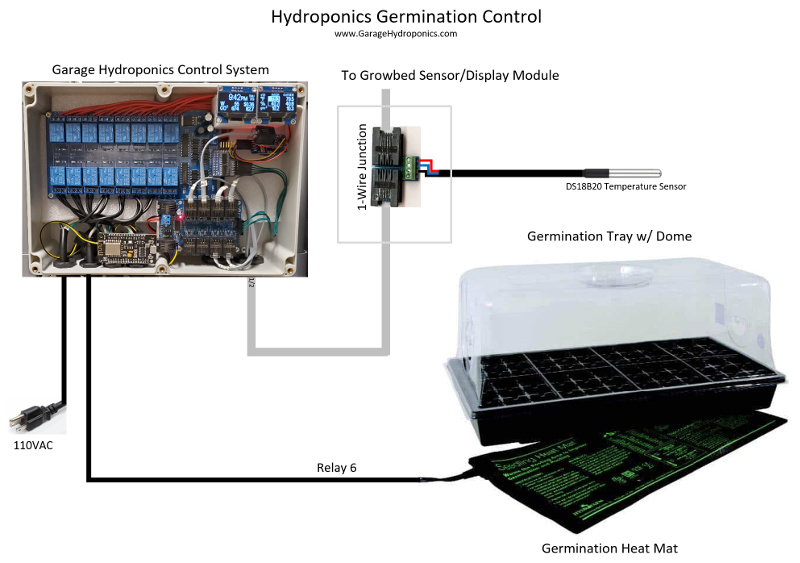
Hydroponics Germination Control
Build a temperature controlled Germination System
Use a temperature sensor to manage a germination heat mat. Heat mats have been found to cut germination periods in half.
Wiring Diagram
Hydroponics Water/Nutrient Control Parts
| Qty | Part | Description | Cost |
|---|---|---|---|
| 1 |
 |
IO Expander Z-Wire Bundle. | $35.00 |
| 1 |
 |
Germination Hot House with Heat Mat, Tray, Cell Insert and Dome. | $29.99 |
| 1 |  |
1M Waterproof DS18B20 Digital Temperature Sensor. | $1.99 |
Build your Temperature Sensor
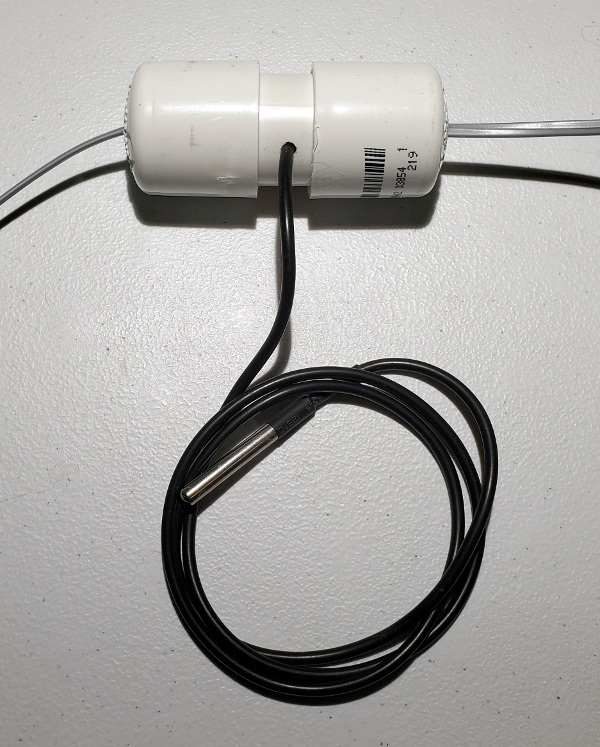
To build a 1-Wire Junction enclosure, it has been designed to fit exactly into a 1" PVC pipe. Cut a 2" length of 1" PVC pipe, and drill a 3/16" hole at the center of the pipe and the center of the 1" end caps. Feed the DS18B20 wires through the outside hole of the 2" PVC pipe and then connect it to the 1-Wire Junction. Then run the phone cables through the end caps, and assemble the parts as shown.
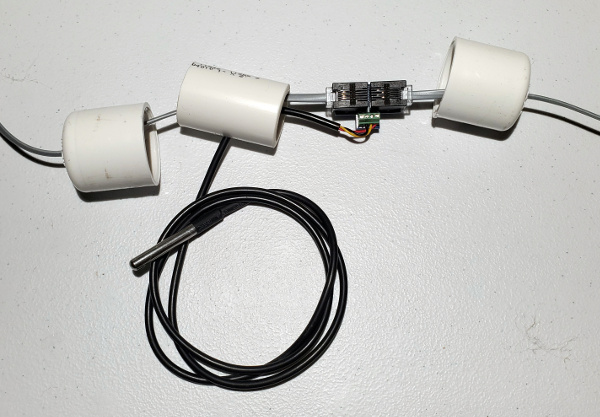
Now compress all the PVC parts together. This will create what I refer to as a 'pill' enclosure because it looks like a giant pill. It's cheap but effective. If you need to make it waterproof you can use silicon to seal the ends where the wires come out.
Germination Code
The heating mat is cycled on/off by the temperature sensor reading that is taken once a minute.
#define HEATER_PAD_ON           "e6o"
#define HEATER_PAD_OFF          "e6f"

...

const char GERMINATION_SENSOR[] = "t2re0";   // Germination Sensor 1-Wire Junction DS18B20

...

        // Check for germination sensor
        germination_temp = 0;
        if (SerialCmd(GERMINATION_SENSOR)) {
          if (SerialReadFloat(&germination_temp)) {
            if (heater_pad) {
              if (C2F(germination_temp) > GERMINATION_OFF_TEMP) heater_pad = false;
            }
            else {
              if (C2F(germination_temp) < GERMINATION_ON_TEMP) heater_pad = true;
            }
          }
          else heater_pad = false;
          SerialReadUntilDone();
        }
        else heater_pad = false;

...

        SerialCmdDone((heater_pad) ? HEATER_PAD_ON : HEATER_PAD_OFF);

...

            if (germination_temp && clk.tm_min & 1 == 1) {
              Serial.print("sf1;sa0;sd0,30,248,\"F\";sa1;sd70,30,\"");
              Serial.print(C2F(germination_temp),1);
              Serial.print("\"");
            }
Monitoring and Display in Grafana

OLED Display
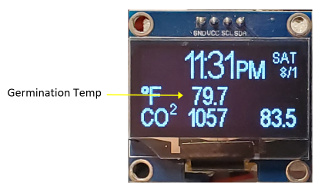
Note: The germination temperature is displayed at the same location as power, during odd minutes.
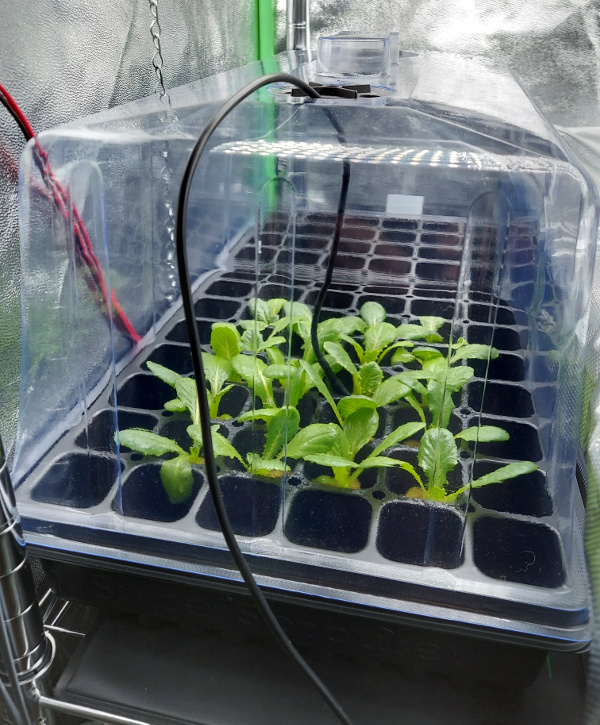
Germination in Action
Pass the temperature probe through one of the air vents in the dome, and make sure it makes contact with one of the saturated rockwool cubes.
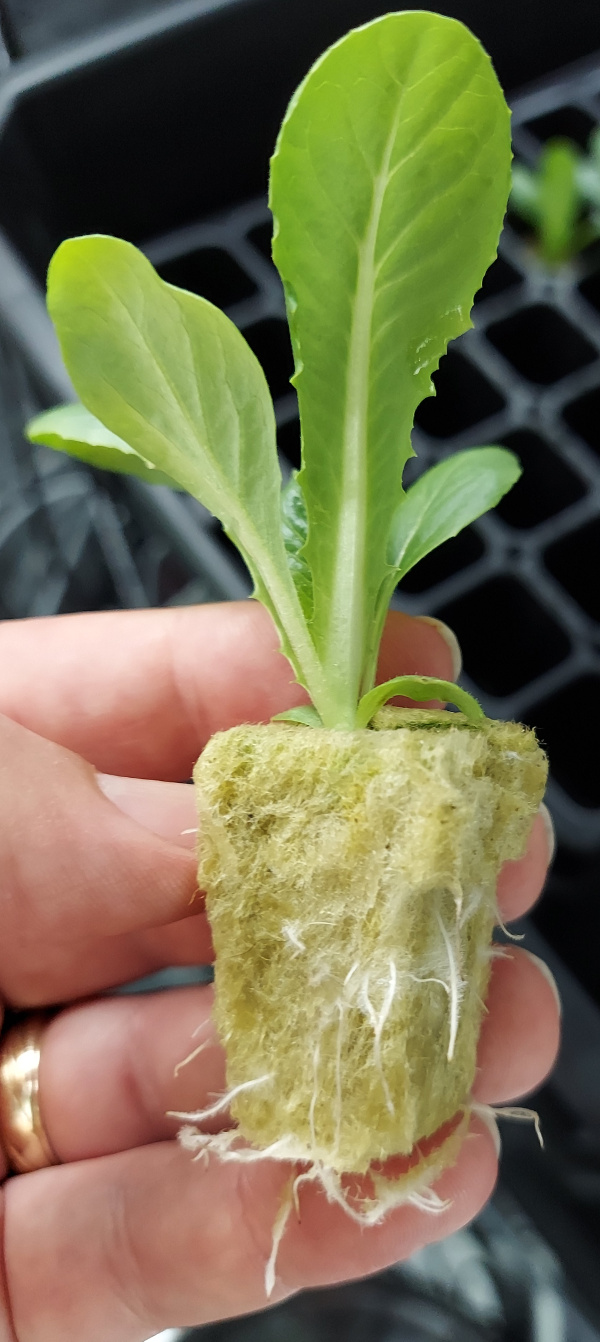
After only 14 days the seedlings are ready for transplanting into the growbeds. By now you should see a healthy root system around and protruding from the bottom of the rockwool.
For the Complete Garage Hydroponics Solution please see our other projects
Garage Hydroponics
Hydroponics Deep Water Culture Bucket System
Hydroponics Growbed Sensors/Display Module
Hydroponics Chiller
Hydroponics Water/Nutrient Control
Hydroponics Database Management
Hydroponics Germination Control
Hydroponics CO2 Monitoring
Hydroponics Light Monitoring
Hydroponics pH and DO Monitoring